Drawing-Captcha is an innovative, open-source software solution that transforms user verification into an engaging and interactive experience. Designed to enhance web security, this tool invites users to complete creative tasks—such as drawing specific patterns or coloring logos within a grid—ensuring a secure and enjoyable verification process. Unlike traditional captchas, Drawing-Captcha combines creativity and security, making it difficult for automated bots to bypass.
Managed entirely through the Drawing-Captcha app, this solution offers seamless integration and compatibility with every form on your website. Whether you're using contact forms, registration pages, or feedback surveys, Drawing-Captcha can be effortlessly incorporated to enhance security and user engagement. The app provides a centralized interface for easy management, customization, and monitoring of your captcha tasks, simplifying the process for developers and administrators alike.
As an open-source project, Drawing-Captcha invites contributions from developers worldwide, fostering a collaborative environment that drives continuous improvement and innovation. Its user-friendly interface ensures that users of all skill levels can seamlessly integrate and manage the captcha system.
Beyond security, Drawing-Captcha offers a unique opportunity for brand promotion. By incorporating recognizable brand elements into the captcha tasks, it helps increase brand awareness and engagement. Users interact with the brand in a memorable way, enhancing brand recall and loyalty.
Whether you're looking to boost security, promote brand recognition, or provide a fun user interaction, Drawing-Captcha offers a comprehensive solution. Join our open-source community to contribute, learn, and inspire. Embrace the future of user verification with Drawing-Captcha—a tool that combines security, creativity, and brand engagement into one seamless experience.
Why choose Drawing Captcha?
Drawing Captcha is a creative approach to user verification, combining security, engagement, and branding in one seamless solution. Here’s why it’s the ideal choice for your website:
Innovative Security:
Utilizes creative tasks like drawing patterns or coloring logos to verify users.
Difficult for automated bots to bypass, enhancing protection for online forms.
Engaging User Experience:
Transforms verification into an interactive and enjoyable process.
Reduces user frustration compared to traditional captchas.
Easy Integration:
Compatible with any form on your website.
Managed through a centralized app for effortless integration and customization.
Open-Source Collaboration:
Invites contributions from developers worldwide.
Fosters continuous improvement and innovation.
Brand Promotion Opportunities:
Incorporates brand elements into captcha tasks.
Enhances brand recognition and user engagement.
Customizable and Scalable:
Tailor the captcha experience to meet specific needs.
Scales effortlessly as your requirements grow.
Drawing Captcha is not just a security tool; it’s a comprehensive solution that elevates user interaction, promotes your brand, and ensures robust protection. Choose Drawing Captcha to redefine your approach.
InstallationLast updated: 4/4/2025 1:04:45 PM
Here is the installation guide for the Drawing Captcha application. You can also utilize Docker for a streamlined setup. To do so, please refer to the section on Docker Compose by following this link:Docker Compose Guide. This section provides detailed instructions on how to clone the repository and run the application locally using Docker.
Prerequisites
Operating System: Ensure you are using a compatible OS (Linux, macOS, or Windows).
Node.js and npm: Make sure Node.js and npm are installed on your system. You can download them from nodejs.org.
MongoDB: Install MongoDB on your system. You can download it from mongodb.com. Or use a docker container.
The project utilizes the following dependencies, each serving specific functionalities and security purposes. Below is an overview of the packages used:
bcryptjs: For securely hashing passwords.
connect-mongodb-session: For storing session data in a MongoDB database.
cookie-parser: For parsing cookies in HTTP requests.
cors: For configuring Cross-Origin Resource Sharing (CORS) to enable secure API access.
csurf: For protecting against Cross-Site Request Forgery (CSRF) attacks.
dotenv: For loading environment variables from a .env file.
ejs: For server-side rendering of HTML templates.
express: A backend framework for building web applications and APIs.
express-rate-limit: For protecting against brute-force attacks by limiting request rates.
express-session: For managing sessions in the application.
helmet: For enhancing HTTP header security.
mongo-sanitize: For preventing NoSQL injection attacks.
mongoose: For interacting with MongoDB databases in an object-oriented manner.
nodemailer: For sending emails from the application.
passport: For implementing authentication strategies.
passport-google-oauth20: For authentication using Google OAuth 2.0.
passport-microsoft: For authentication using Microsoft OAuth 2.0.
path: For working with file paths.
postmark: For sending emails via the Postmark service.
uuid: For generating unique IDs.
validator: For validating and sanitizing input data.
xss: For protecting against Cross-Site Scripting (XSS) attacks.
Step 4: Configure Environment Variables
Create a .env file in the root of the project directory. Here you can find the explanations for the env variables
Add the following environment variables to the .env file:
    MONGO_INITDB_ROOT_USERNAME=root
MONGO_INITDB_ROOT_PASSWORD=rootTest
MONGO_INITDB_DATABASE=drawing-captcha
MONGO_URI=mongodb://localhost:7500/drawing-captcha
SERVER_DOMAIN=https://yourdomain.com
PORT=9091
REGISTER_KEY=&&+%&%ajkhdjhWIIWNw7>dajh2gg
[email protected]
DC_ADMIN_PASSWORD=admin
# if you dont want to use a email verification just leave that empty:
EMAIL_SERVICE=
EMAIL_FROM=
SMTPAUTH_EMAIL_HOST=
SMTPAUTH_EMAIL_PORT=587
SMTPAUTH_EMAIL_USER=
SMTPAUTH_EMAIL_PASS=
POSTMARK_SERVER_CLIENT=
POSTMARK_MESSAGE_STREAM=
Step 5: Start the app
Once you have completed the configuration of your application, you can initiate it by executing the following command in your terminal:
node app.js
You can access your application instance on your configured port on localhost.
Request FlowLast updated: 8/12/2025 1:11:22 PM
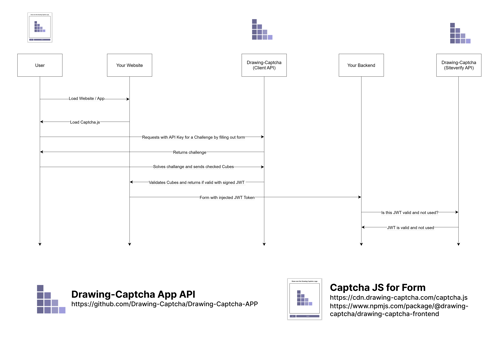
Request Flow Drawing Captcha
Request Flow Drawing Captcha
1. User Interaction
The user visits your website or app, initiating the process.
2. Captcha Script Loading
Your website loads the Captcha.js script from the Drawing Captcha frontend.
3. Challenge Request
Your website sends a request to the Drawing Captcha Client API, including your API key, to retrieve a challenge for the user.
4. Challenge Response
The Drawing Captcha Client API responds with a challenge that is displayed to the user.
5. User Solves Challenge
The user solves the challenge (e.g., by interacting with the captcha) and submits the checked cubes.
6. Validation Request
The Drawing Captcha Client API validates the submitted cubes. If the solution is correct, it returns a signed JWT (JSON Web Token).
7. Form Submission
The form is submitted back to your backend with the injected JWT.
8. Backend Validation
Your backend sends the JWT to the Drawing Captcha Siteverify API to confirm its validity and ensure it hasn’t been used before.
9. Final Verification
If the JWT is valid and unused, the captcha verification is successful, and the process is complete.
EnvironmentLast updated: 4/25/2025 8:02:25 AM
These environment variables are crucial for configuring the application and ensuring it operates smoothly with MongoDB and email services. Adjust these values according to your specific setup and security requirements.
Environment Variable
Purpose
Example
Usage
MONGO_INITDB_ROOT_USERNAME
Sets the root username for MongoDB
root
Used for MongoDB authentication during initialization
MONGO_INITDB_ROOT_PASSWORD
Sets the root password for MongoDB
rootTest
Required to log in to MongoDB as the root user
MONGO_INITDB_DATABASE
Specifies the name of the initial database in MongoDB
drawing-captcha
Database where application data is stored
MONGO_URI
Connection string for MongoDB
mongodb://localhost:7500/drawing-captcha
Used by the application to connect to MongoDB
SERVER_DOMAIN
Domain where the application will be hosted
https://yourdomain.com
Important for configuring CORS and domain accessibility
PORT
Port on which the application server will run
9091
Used to access the application locally or on the server
Appears in the "from" field of emails sent by the application
SMTPAUTH_EMAIL_HOST
SMTP server host
Required if smtpAuth is chosen as the email service
SMTPAUTH_EMAIL_PORT
SMTP server port
Required if smtpAuth is chosen as the email service
SMTPAUTH_EMAIL_USER
SMTP server username
Required if smtpAuth is chosen as the email service
SMTPAUTH_EMAIL_PASS
SMTP server password
Required if smtpAuth is chosen as the email service
POSTMARK_SERVER_CLIENT
Postmark server client identifier
Required if postmark is chosen as the email service
POSTMARK_MESSAGE_STREAM
Postmark message stream identifier
Required if postmark is chosen as the email service
BASIC_AUTH
Basic Authentication with Email and Password This is required for the initialUser defined by DC_ADMIN_EMAIL to log in. You can disable it afterward, if you only want to use the OAuth2.0 from Microsoft/Google, but ensure that you have at least one user with appAdmin rights to continue managing your RBAC properly.
Recomended for initialUser
GOOGLE_CLIENT_ID
The Client ID for Google OAuth2.0 authentication. This is required to enable Google sign-in for your application.
Required if using Google OAuth2.0
GOOGLE_CLIENT_SECRET
The Client Secret for Google OAuth2.0 authentication. This is used to securely authenticate your application with Google's API.
Required if using Google OAuth2.0
MICROSOFT_CLIENT_ID
The Client ID for Microsoft OAuth2.0 authentication. This is required to enable Microsoft sign-in for your application.
Required if using Microsoft OAuth2.0
MICROSOFT_CLIENT_SECRET
The Client Secret for Microsoft OAuth2.0 authentication. This is used to securely authenticate your application with Microsoft's API.
Required if using Microsoft OAuth2.0
MICROSOFT_TENANT_ID
The MICROSOFT_TENANT_ID in your environment specifies the unique Azure AD tenant your application will use for authentication and authorization with Microsoft services, but it is not mandatory—by default, the "common" tenant is used if this variable is not set.
Not Required on default the "common" is used.
Drawing-Captcha-AppLast updated: 5/30/2025 6:38:03 AM
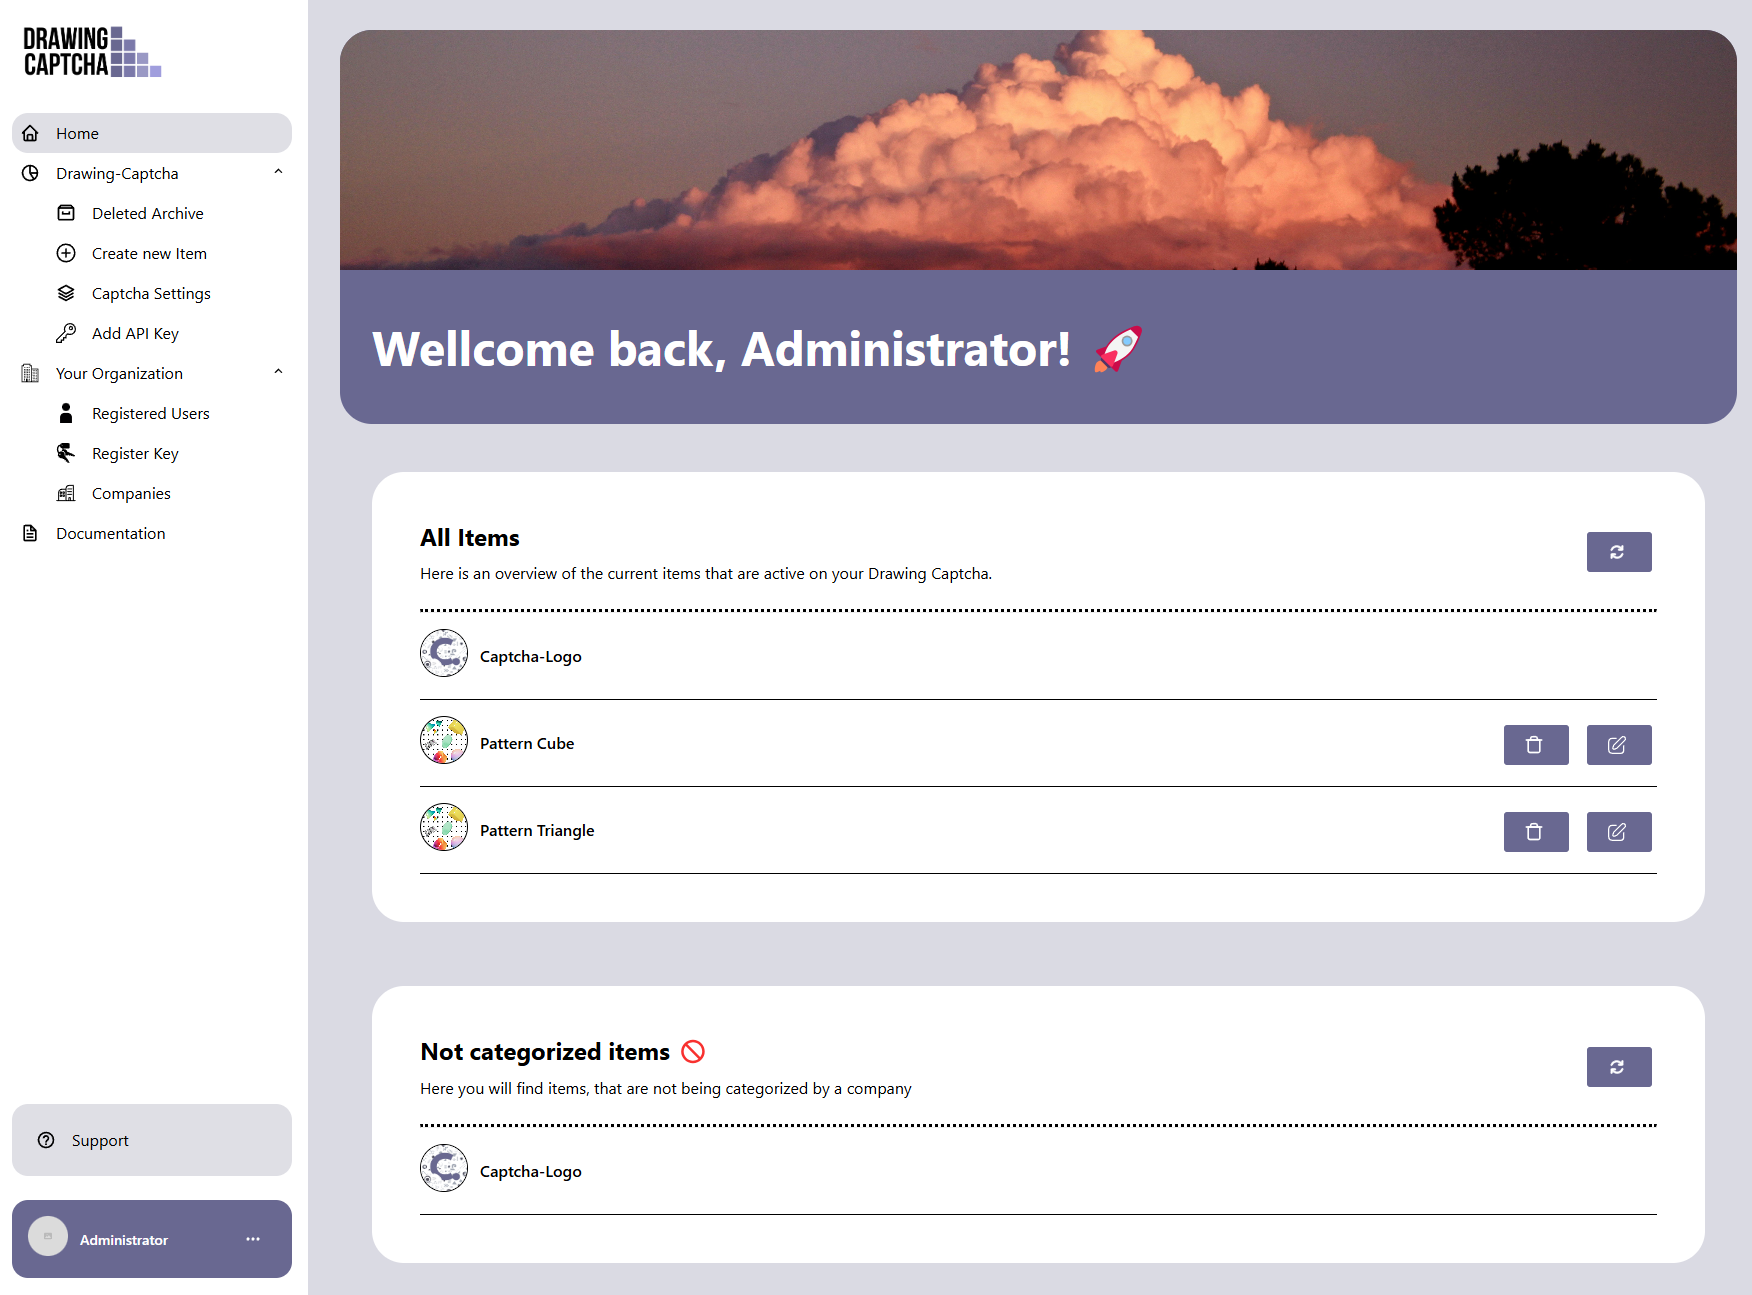
Home
On the Home Dashboard Screen, as an App Administrator, you have access to view all Captchas and Companies. If you are a basic admin for a specific company, you will only see the Captchas associated with your company and have the ability to edit them.
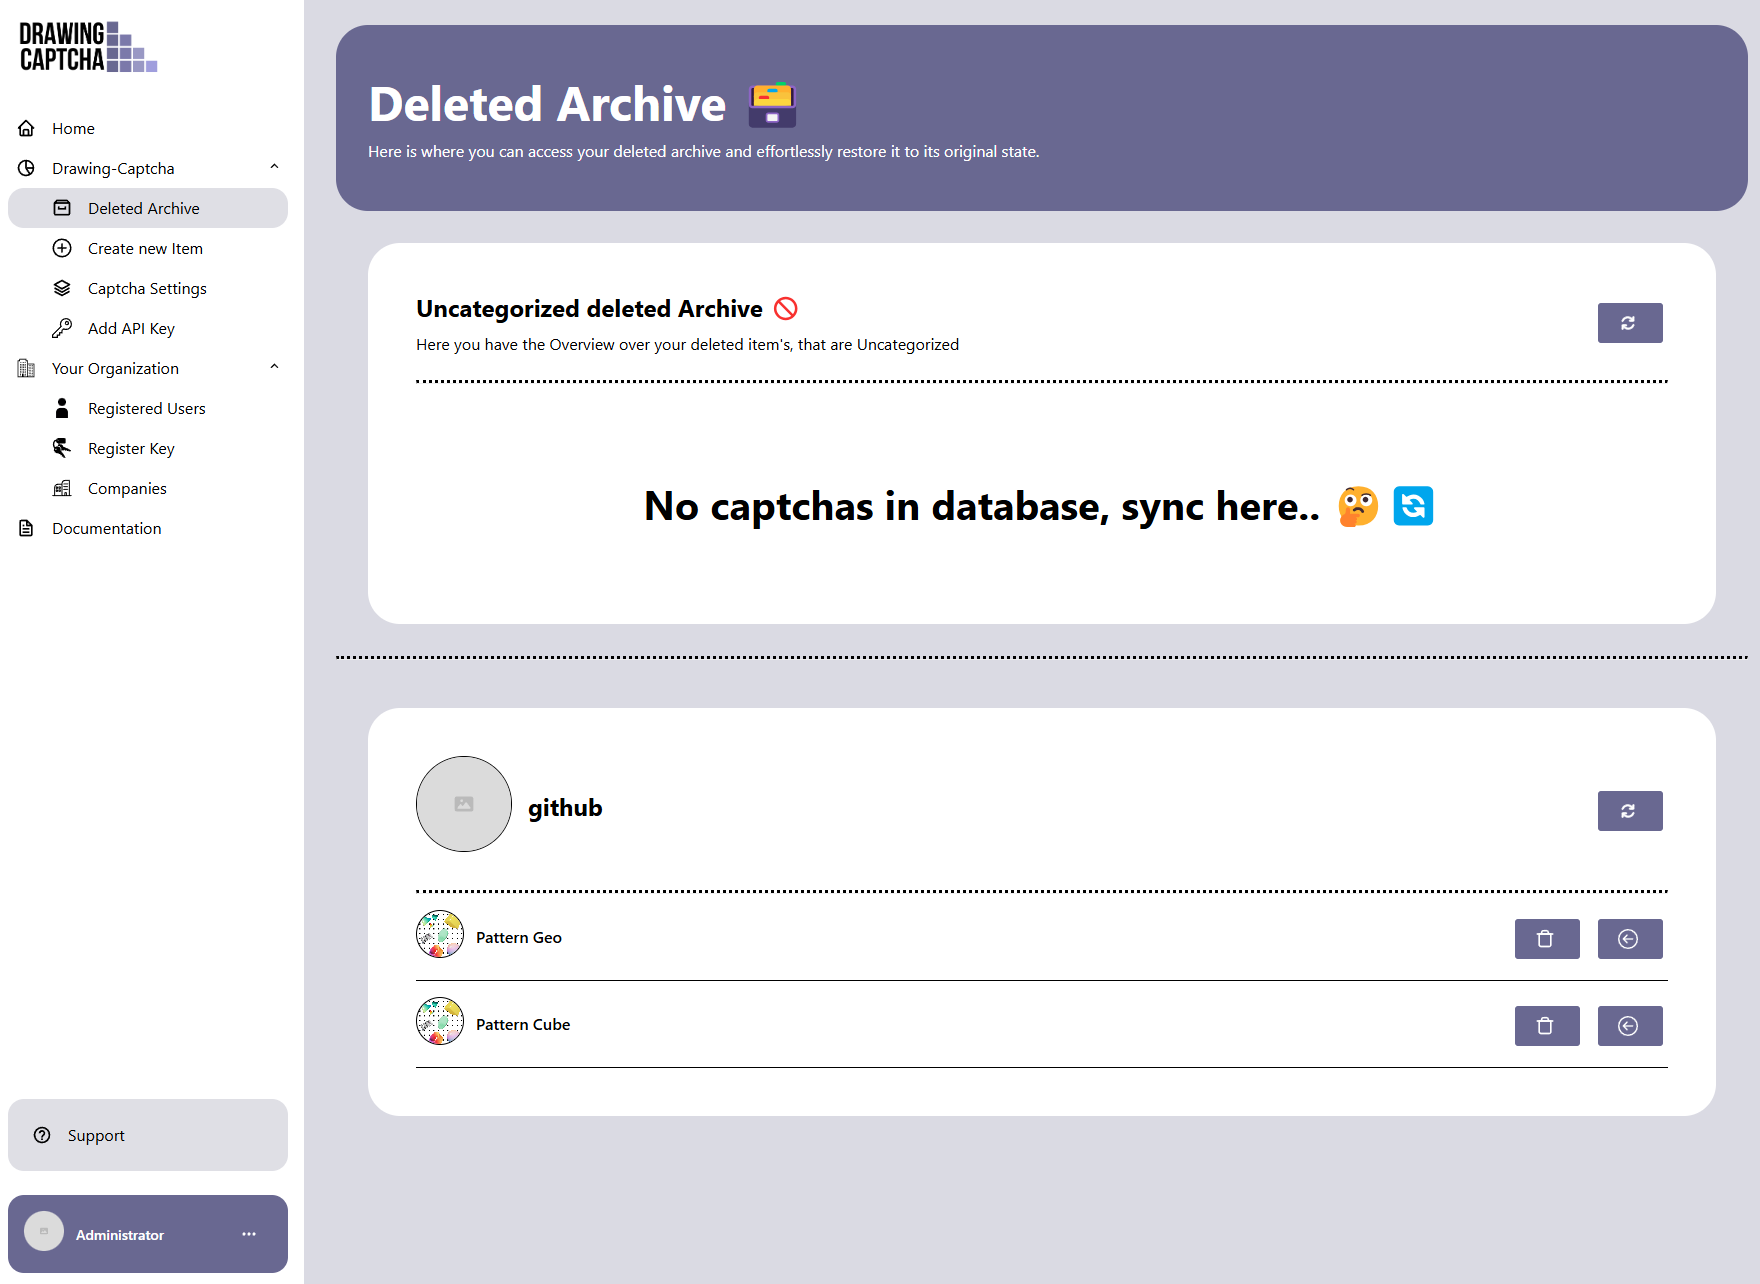
Deleted Archive
The Deleted Archive contains Captchas that have been removed from the Home Dashboard. These Captchas are inactive here, providing a space to store them temporarily. You can reactivate them by using the arrow button to restore them to active status.
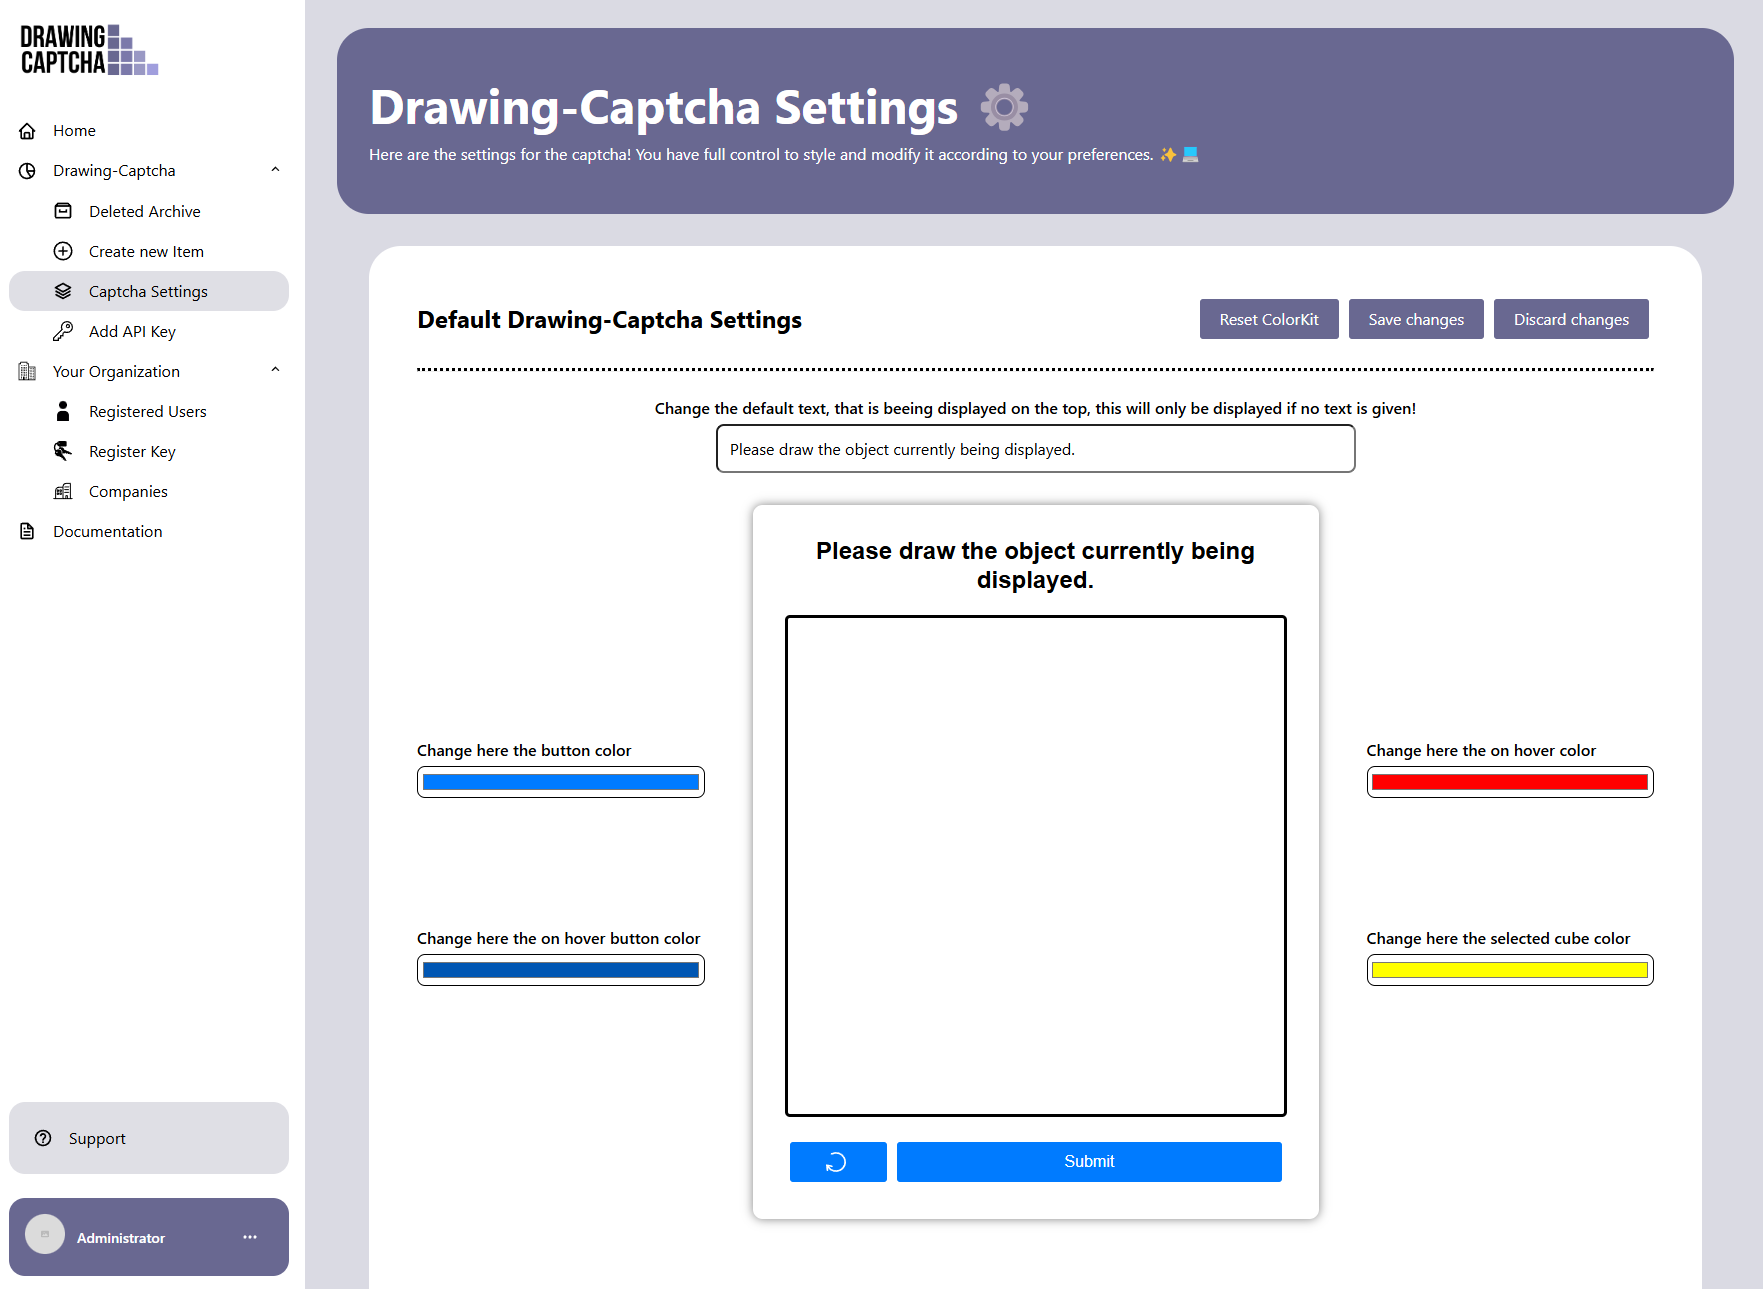
Settings
The Drawing Captcha settings allow you to customize the appearance and default text of the Captcha. You have the option to reset these settings to their default values at any time. Additionally, you can choose the color for the Drawing Captcha to suit your preferences.
Note
Please note that the appAdmin can only modify the default settings, which are inherited by other companies and can be reset to these defaults. To apply company-specific coloring, you must first create the company. The admin within that company can then customize the color scheme to suit their needs.
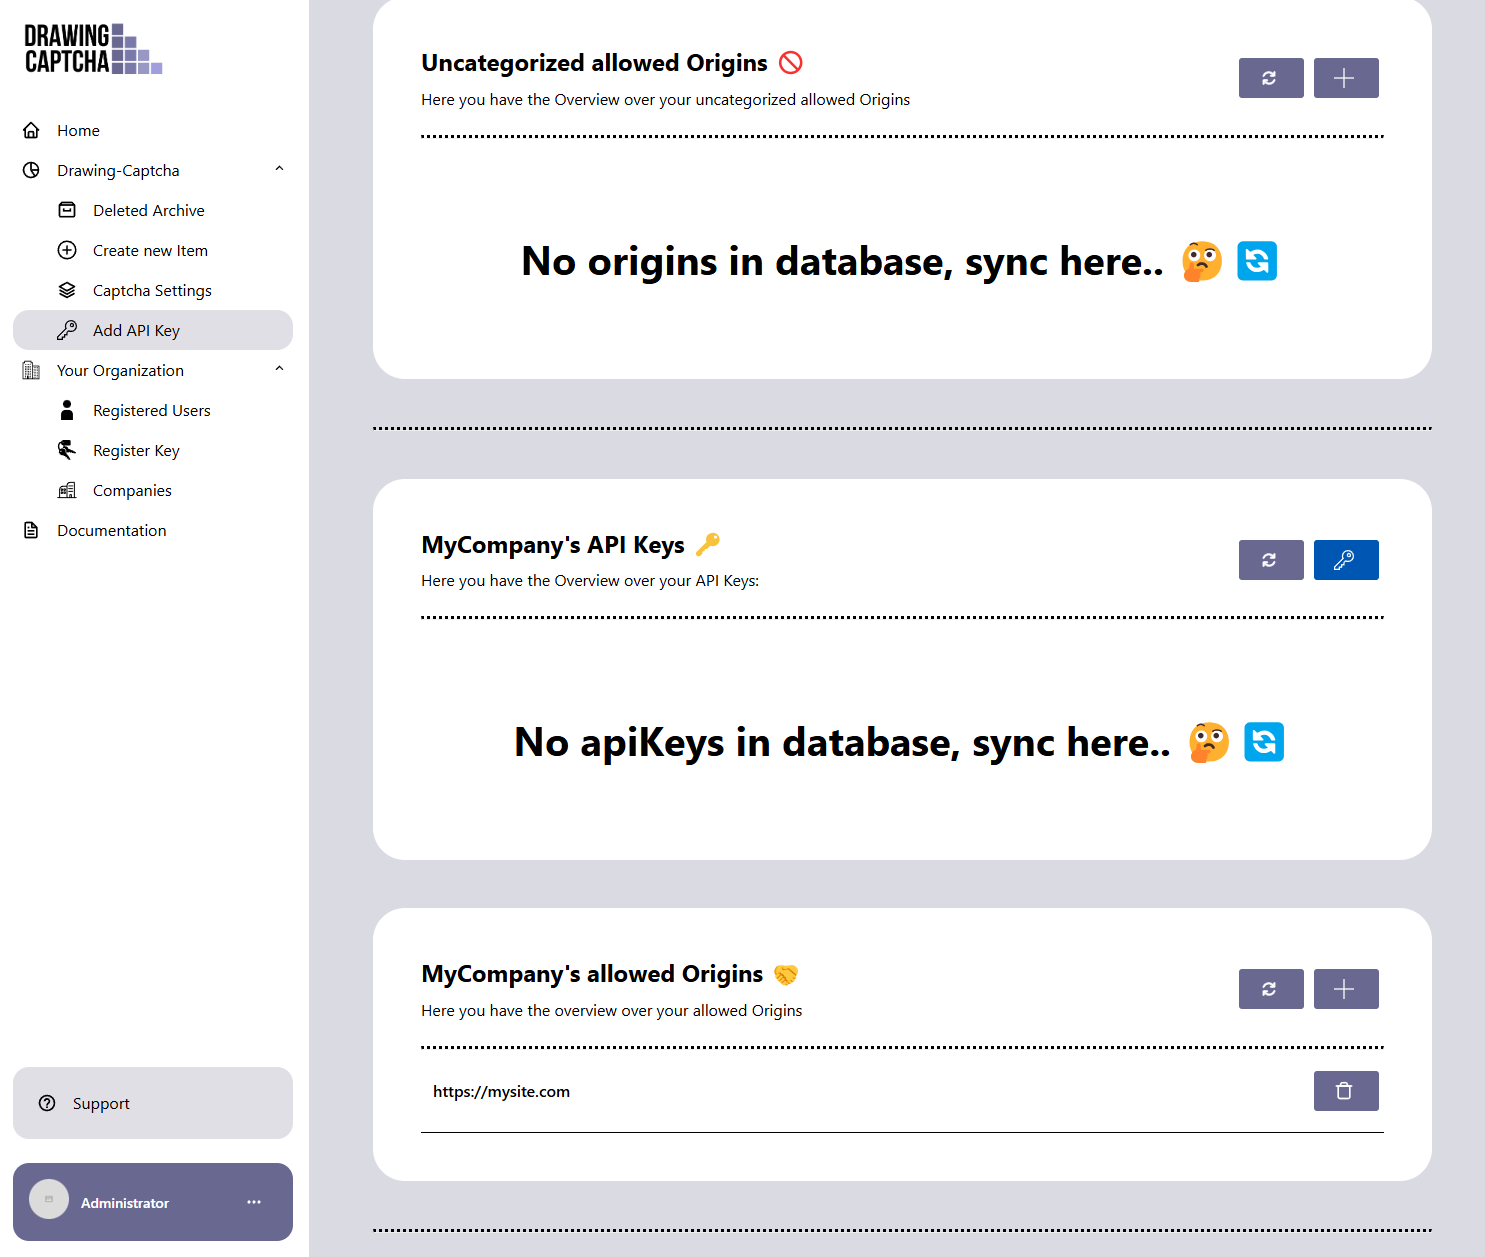
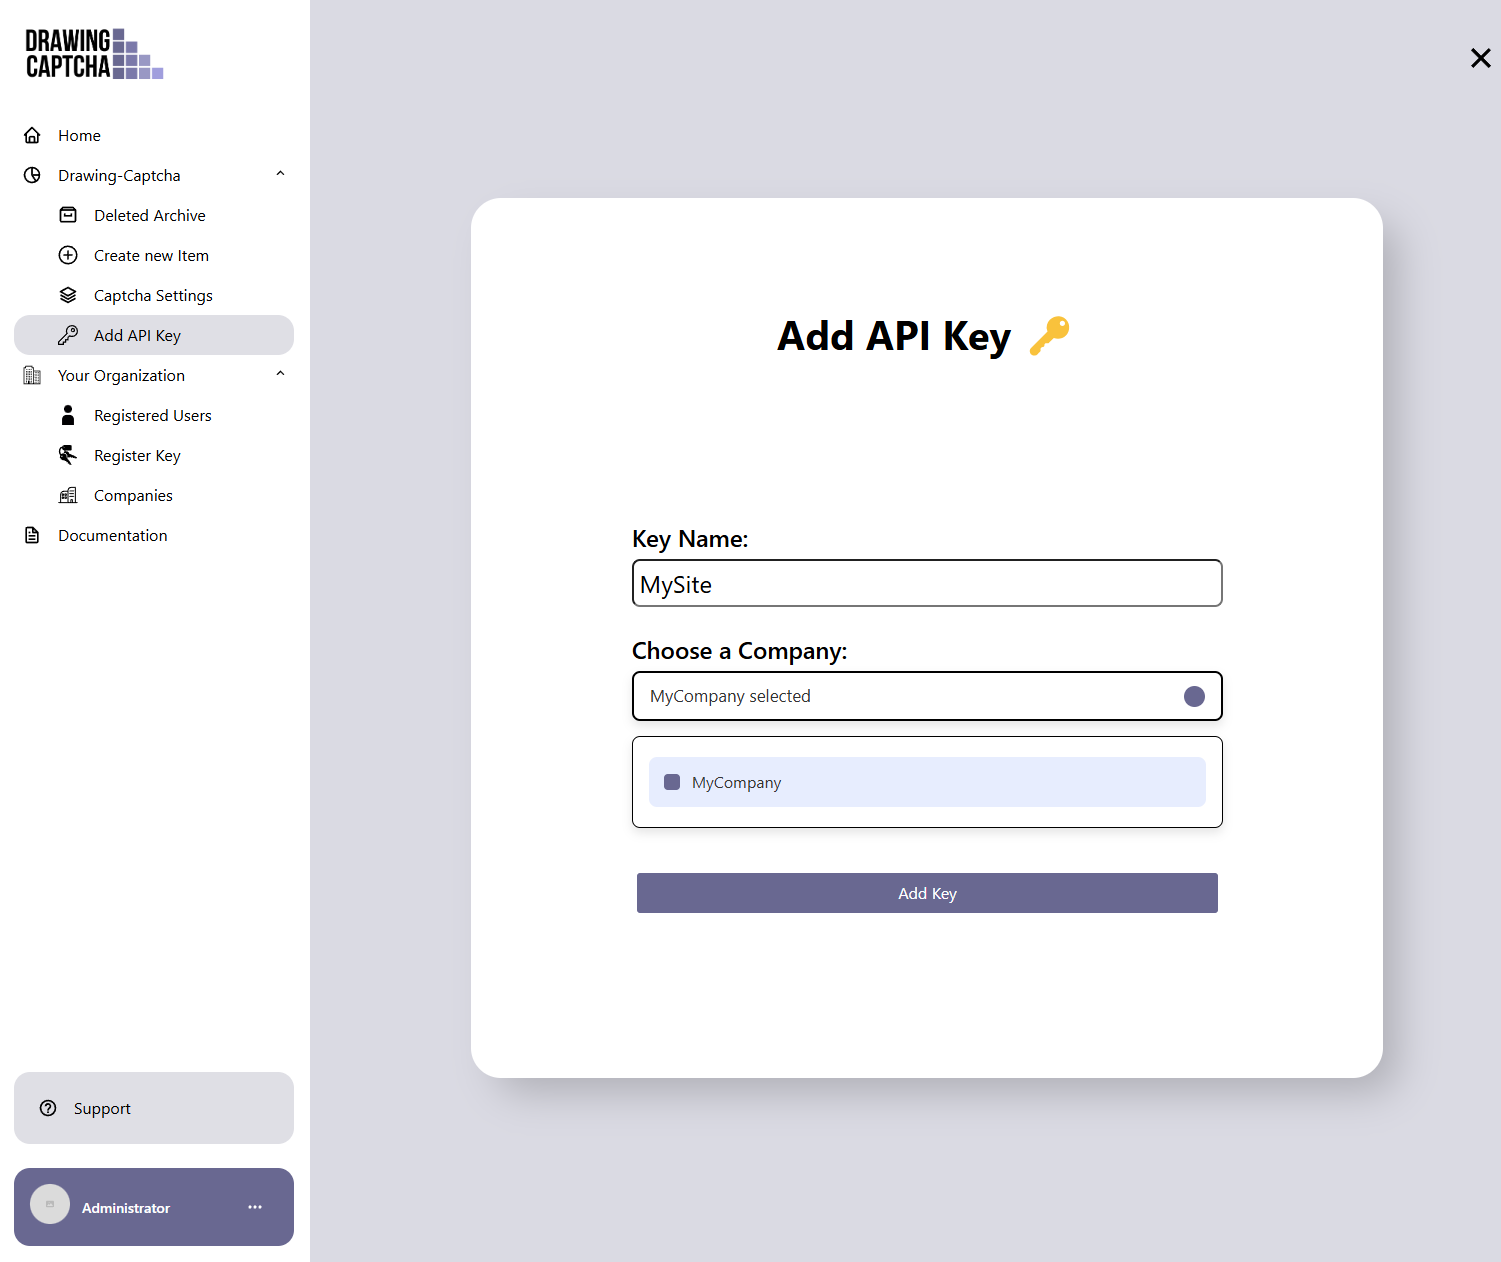
Api Keys & Allowed Origins
You can create API keys for use in your implementation, enabling the display of the Drawing Captcha on your form, make sure you have created your company first because you would need to reference to one.
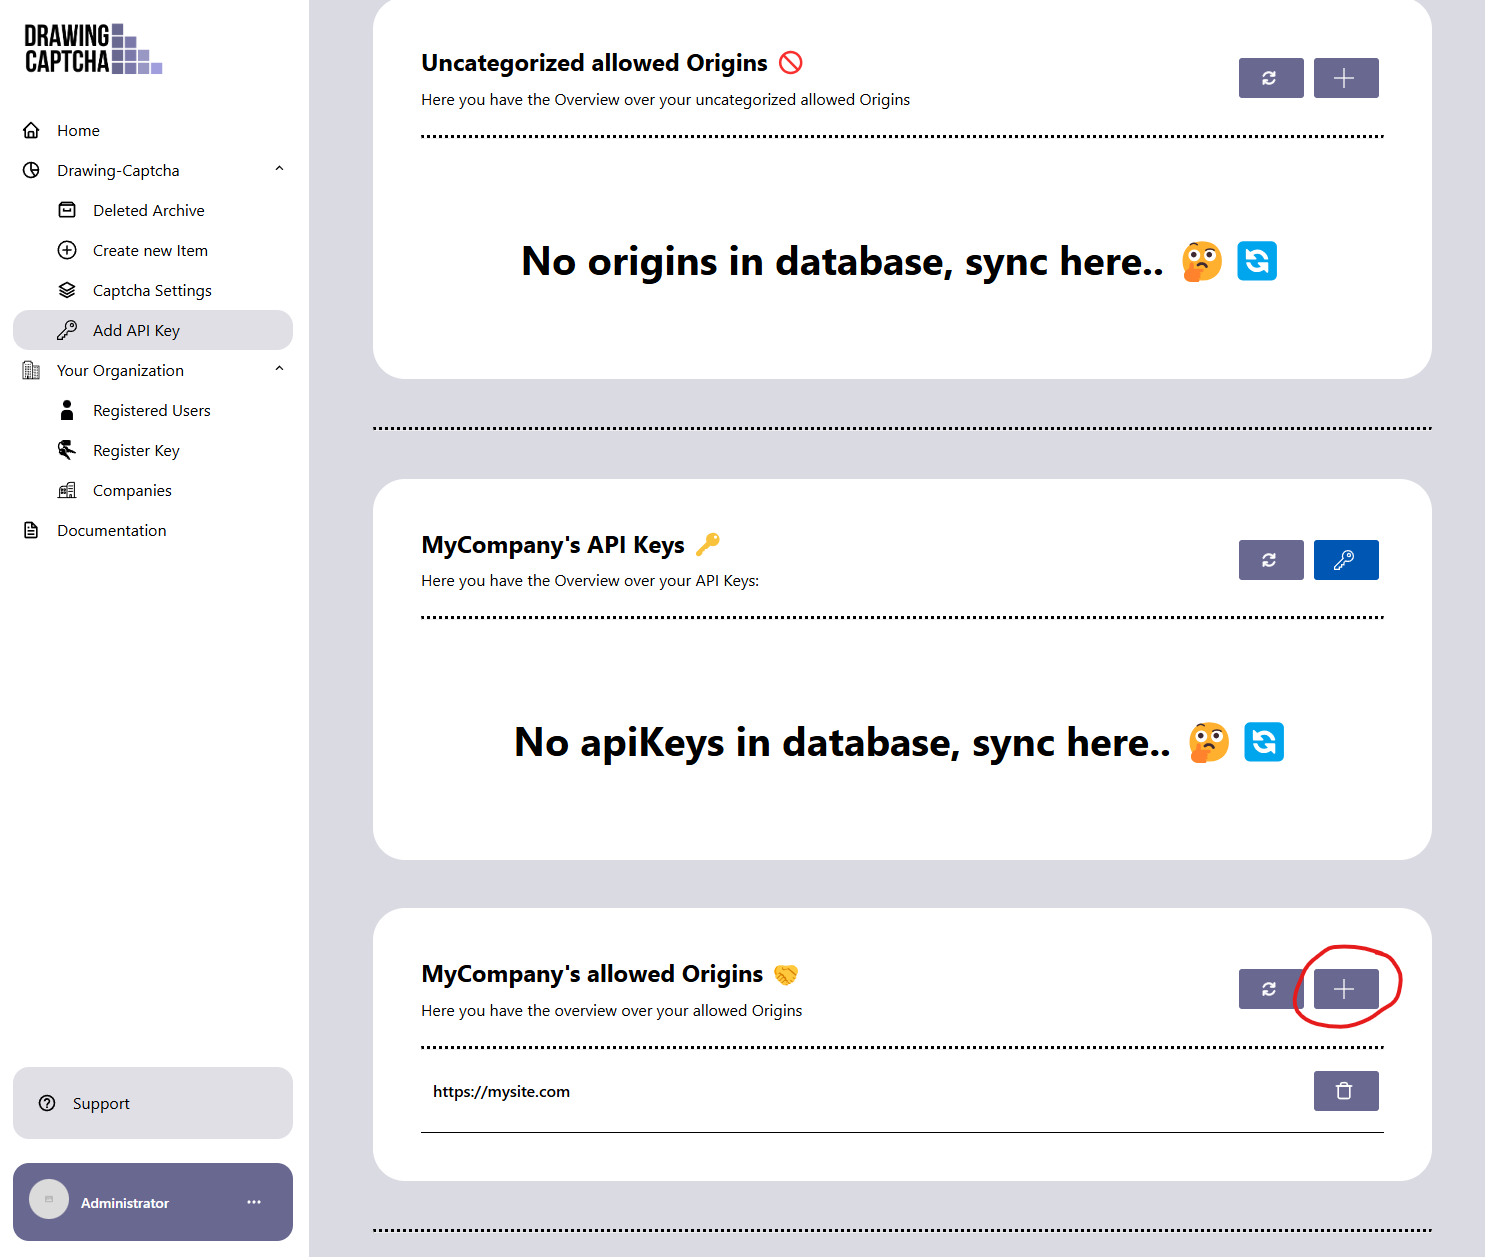
API keys are used to communicate with your form (captcha.js), and it is not dangerous if your key is open. You can only fetch with this API key if you have entered the allowed origin. These keys are specifically for your company and can only fetch data from your company's services. This is why you need an allowed origin with an API key:
If you want to allow a origin, which is nessecery to allow the usages of your api keys you have to create it under allowed origins:
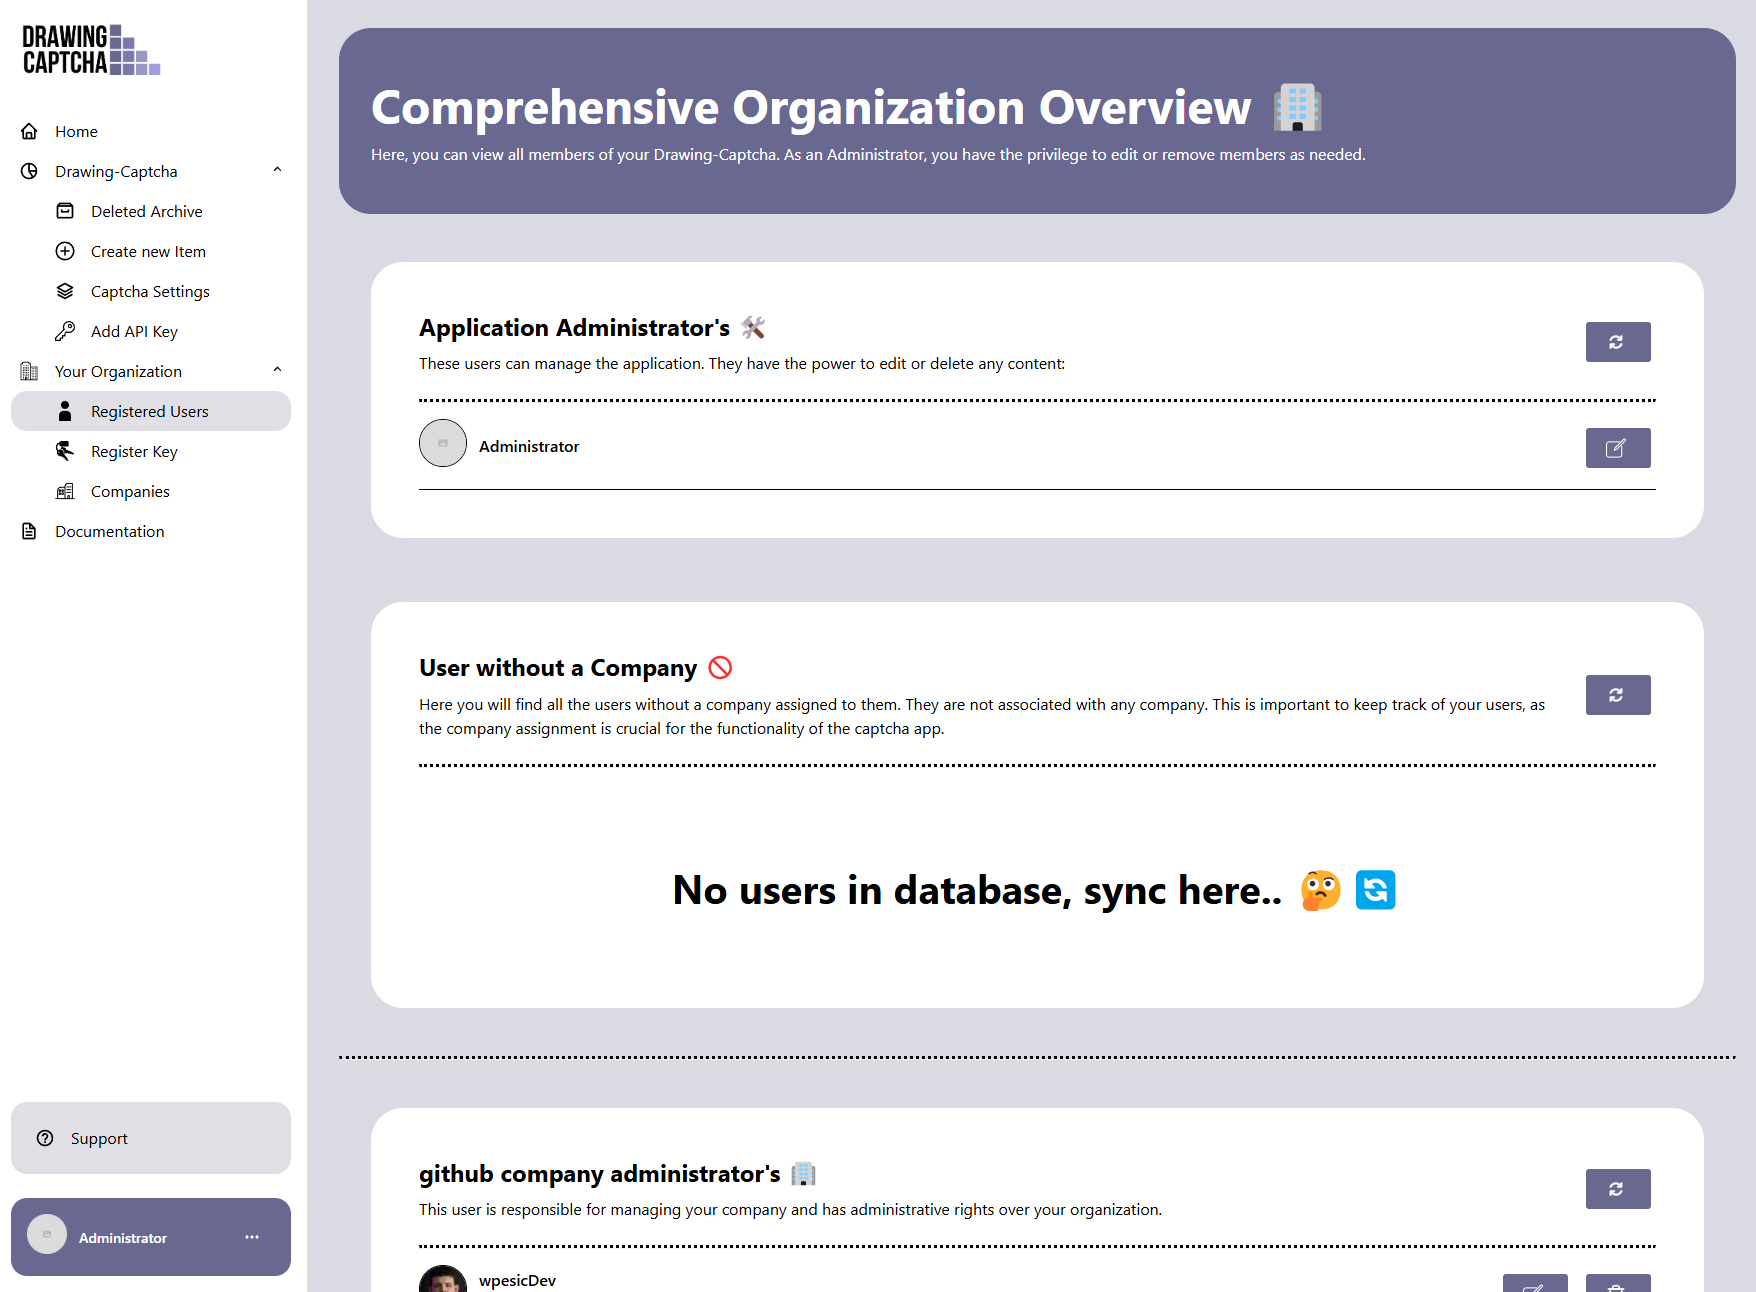
Registered Users
In the Registered Users section, you can view all users registered on this instance. As an app admin, you have the ability to manage your own user account, change your password, assign users to different companies, and manage users as an admin within your company. However, you have visibility into all companies and their users. As a company admin, you can only see app admins and the users within your own company.
Note
As an app admin, you have the ability to view and manage users across all companies within this instance, including changing your own password and assigning users to different companies. However, company admins are limited to viewing and managing only the users within their specific company, along with app admins.
Register Key
The register key is used to allow a user to sign up on a page and be associated with a specific company. This is why each company has its own register key. The app register key is intended for users who are not assigned to any company and can be assigned to a company by an app admin.
Note
The register key is essential for associating users with specific companies. Each company is assigned its own unique register key. Users who are not associated with any company can be assigned to one by an app admin using the app register key.
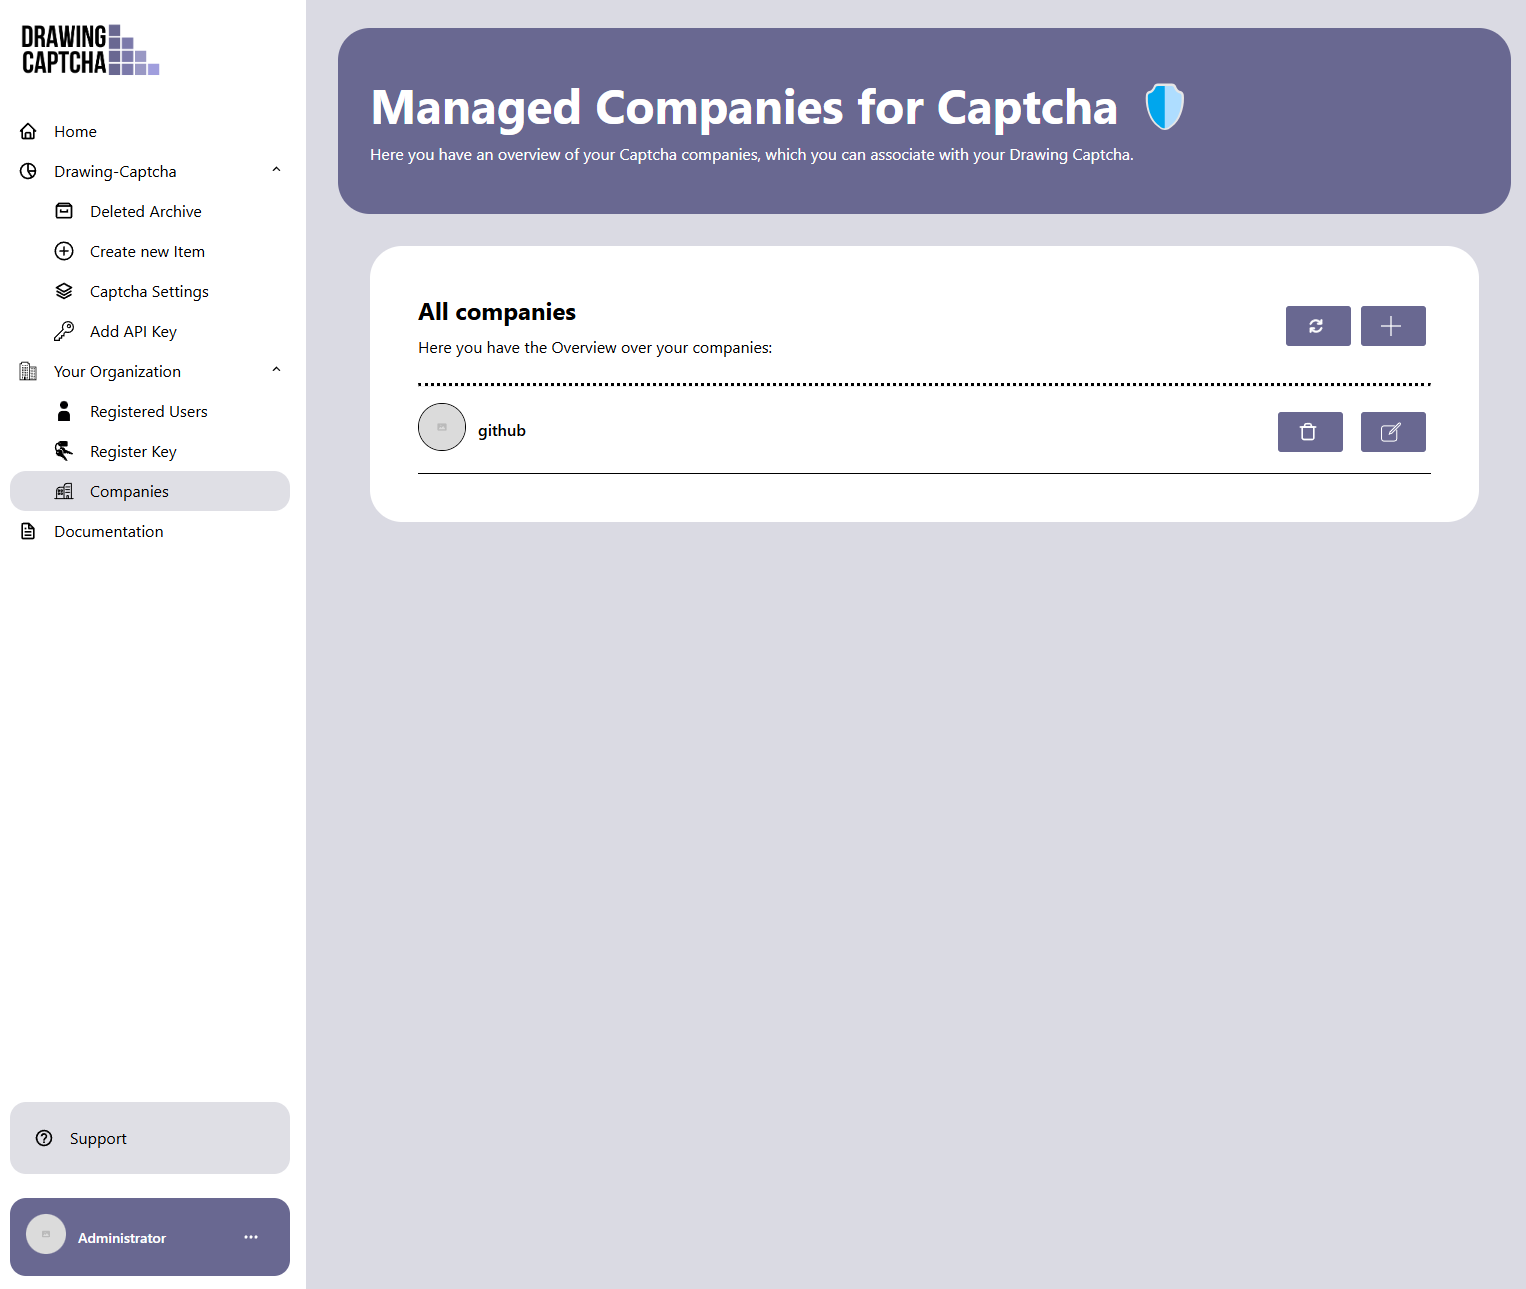
Companies
As an App Admin, you have the ability to create, update, and delete companies. This section allows you to perform these actions.
Note
Please note that only an App Admin can create a company; a Company Admin does not have this capability.
API'sLast updated: 2/18/2025 2:18:25 PM
Coming Soon
ImplementationLast updated: 4/8/2025 11:27:24 AM
Learn how to integrate Drawing-Captcha into your web forms to enhance security and user experience. Our easy-to-follow guide covers installation, configuration, and usage, helping you discover features like customizable patterns, responsive design, and seamless integration. Perfect for developers seeking innovative captcha solutions for their projects, Drawing-Captcha is built on web standards and can be implemented in any HTML form.
Option 1: Installation with CDN
For a quick and easy integration, you can use the Drawing-Captcha frontend via our CDN. This eliminates the need to install the package locally via npm. Simply add the following script tag to your HTML file:
Will be updated automatically with the newest features
Option 2: Installation via npm
If you prefer to manage the Drawing-Captcha frontend locally within your project, you can install it via npm. Run the following command in your project console:
To implement your Drawing Captcha, navigate to the back office of your Drawing Captcha App instance and create an API key with an origin specific to your company.
Step 2: Initialize Captcha
First, you need to call the initialize function from the package you just installed. Add the following script tag to your HTML:
Generate an API key from your Drawing Captcha Instance in the back office. Then, add the API key and server details into the following script variables:
Step 4: Add Drawing-Captcha Attribute to Your Form
Drawing-Captcha Attribute is needed to trigger the Drawing Captcha on your form you have to put this attribute where you want the drawing captcha to trigger on submit.
To enable the captcha on your form, add thedrawing-captcha attribute to the form element. Here is an example of what your form could look like:
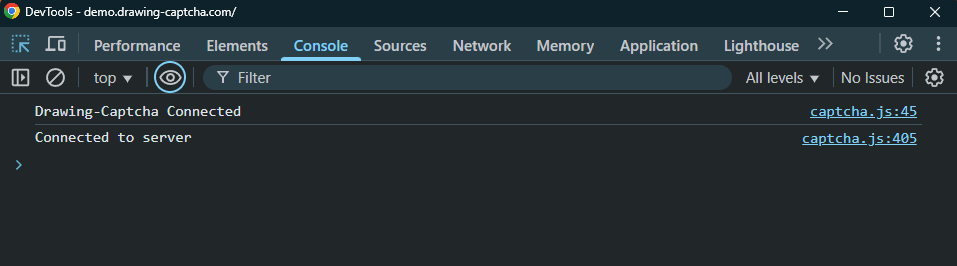
Step 5: Validate Connection
If everything is functioning correctly, you can verify the connection status by checking the developer tools. There, you can confirm if the test connection was successful:
Docker-ComposeLast updated: 4/8/2025 1:18:55 PM
This guide describes how to install and run the Drawing Captcha App using Docker Compose on your server. You can find a Image of the Drawing Captcha App on Dockerhub.
This package extends Umbraco Forms by integrating the Drawing Captcha App, an innovative tool for verifying human users through interactive drawing tasks. Users are prompted to complete specific patterns or color logos on a grid, ensuring a secure and engaging verification process. Integration is achieved via a NuGet package, allowing easy configuration of your server instance and API key through appsettings.
To use the Drawing Captcha integration, you need a separate instance (Drawing Captcha App) dedicated to validating captchas. This instance allows you to create and customize captchas according to your preferences.
After installation, implement the script that triggers the drawing captcha attributes. It is recommended to place this script in the base page view to ensure it is rendered after the form integration example on normal html:
Ensure your API key and server are configured in appsettings.json:
You can obtain an API key by creating a company account if you haven't done so already. Make sure to allow the origin that will be using the drawing captcha.
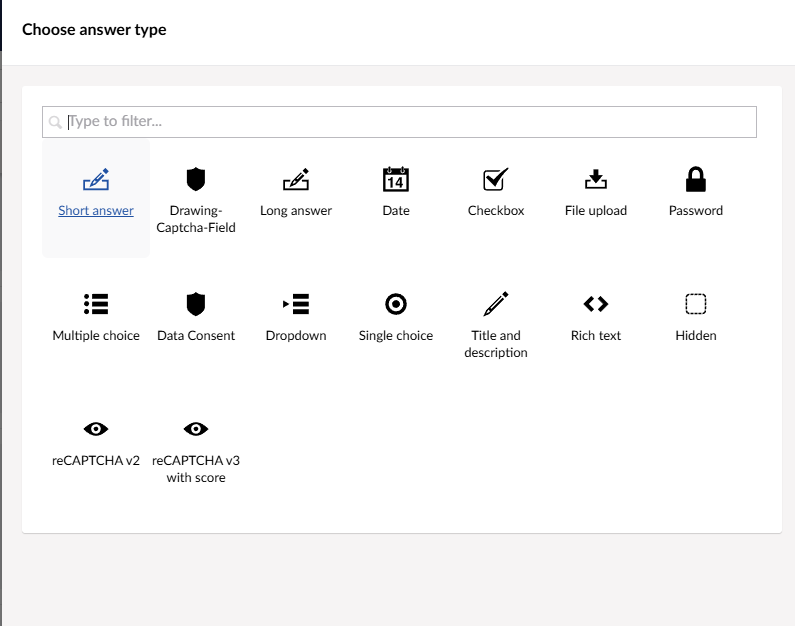
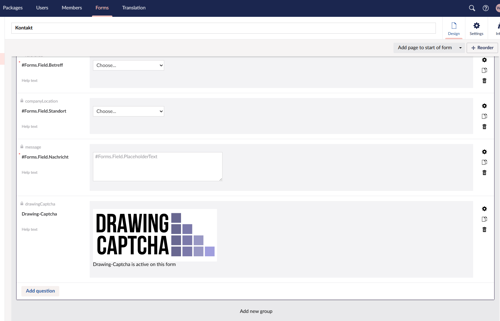
After setting up the configuration, navigate to the Umbraco Forms backoffice. You should see the extended field type added by the package, indicating that the drawing captcha is active.
Here you can see that the drawing captcha is active:
Contributions are what make the open-source community such an amazing place to learn, inspire, and create. Any contributions you make are greatly appreciated.
If you have a suggestion that would make this better, please fork the repo and create a pull request. You can also simply open an issue with the tag "enhancement". Don't forget to give the project a star! Thanks again!
Fork the project
Create your feature branch (git checkout -b feature/AmazingFeature)
Commit your changes (git commit -m 'Add some AmazingFeature')
Push to the branch (git push origin feature/AmazingFeature)